Five things Mojave Paint does better than Photoshop
Let me just say I love Photoshop, and it wasn’t easy to come up with this list. I could easily come up with a “50 things Mojave Paint does better than Affinity Photo” but Photoshop is so rich and so mature I had to really think about it.
I can’t pretend to have implemented even 5% of the feature set of Photoshop, but as an independent Mac developer I have to celebrate the small wins here!
1. TYPE LAYERS KEEP THEIR INTRINSIC ROTATION
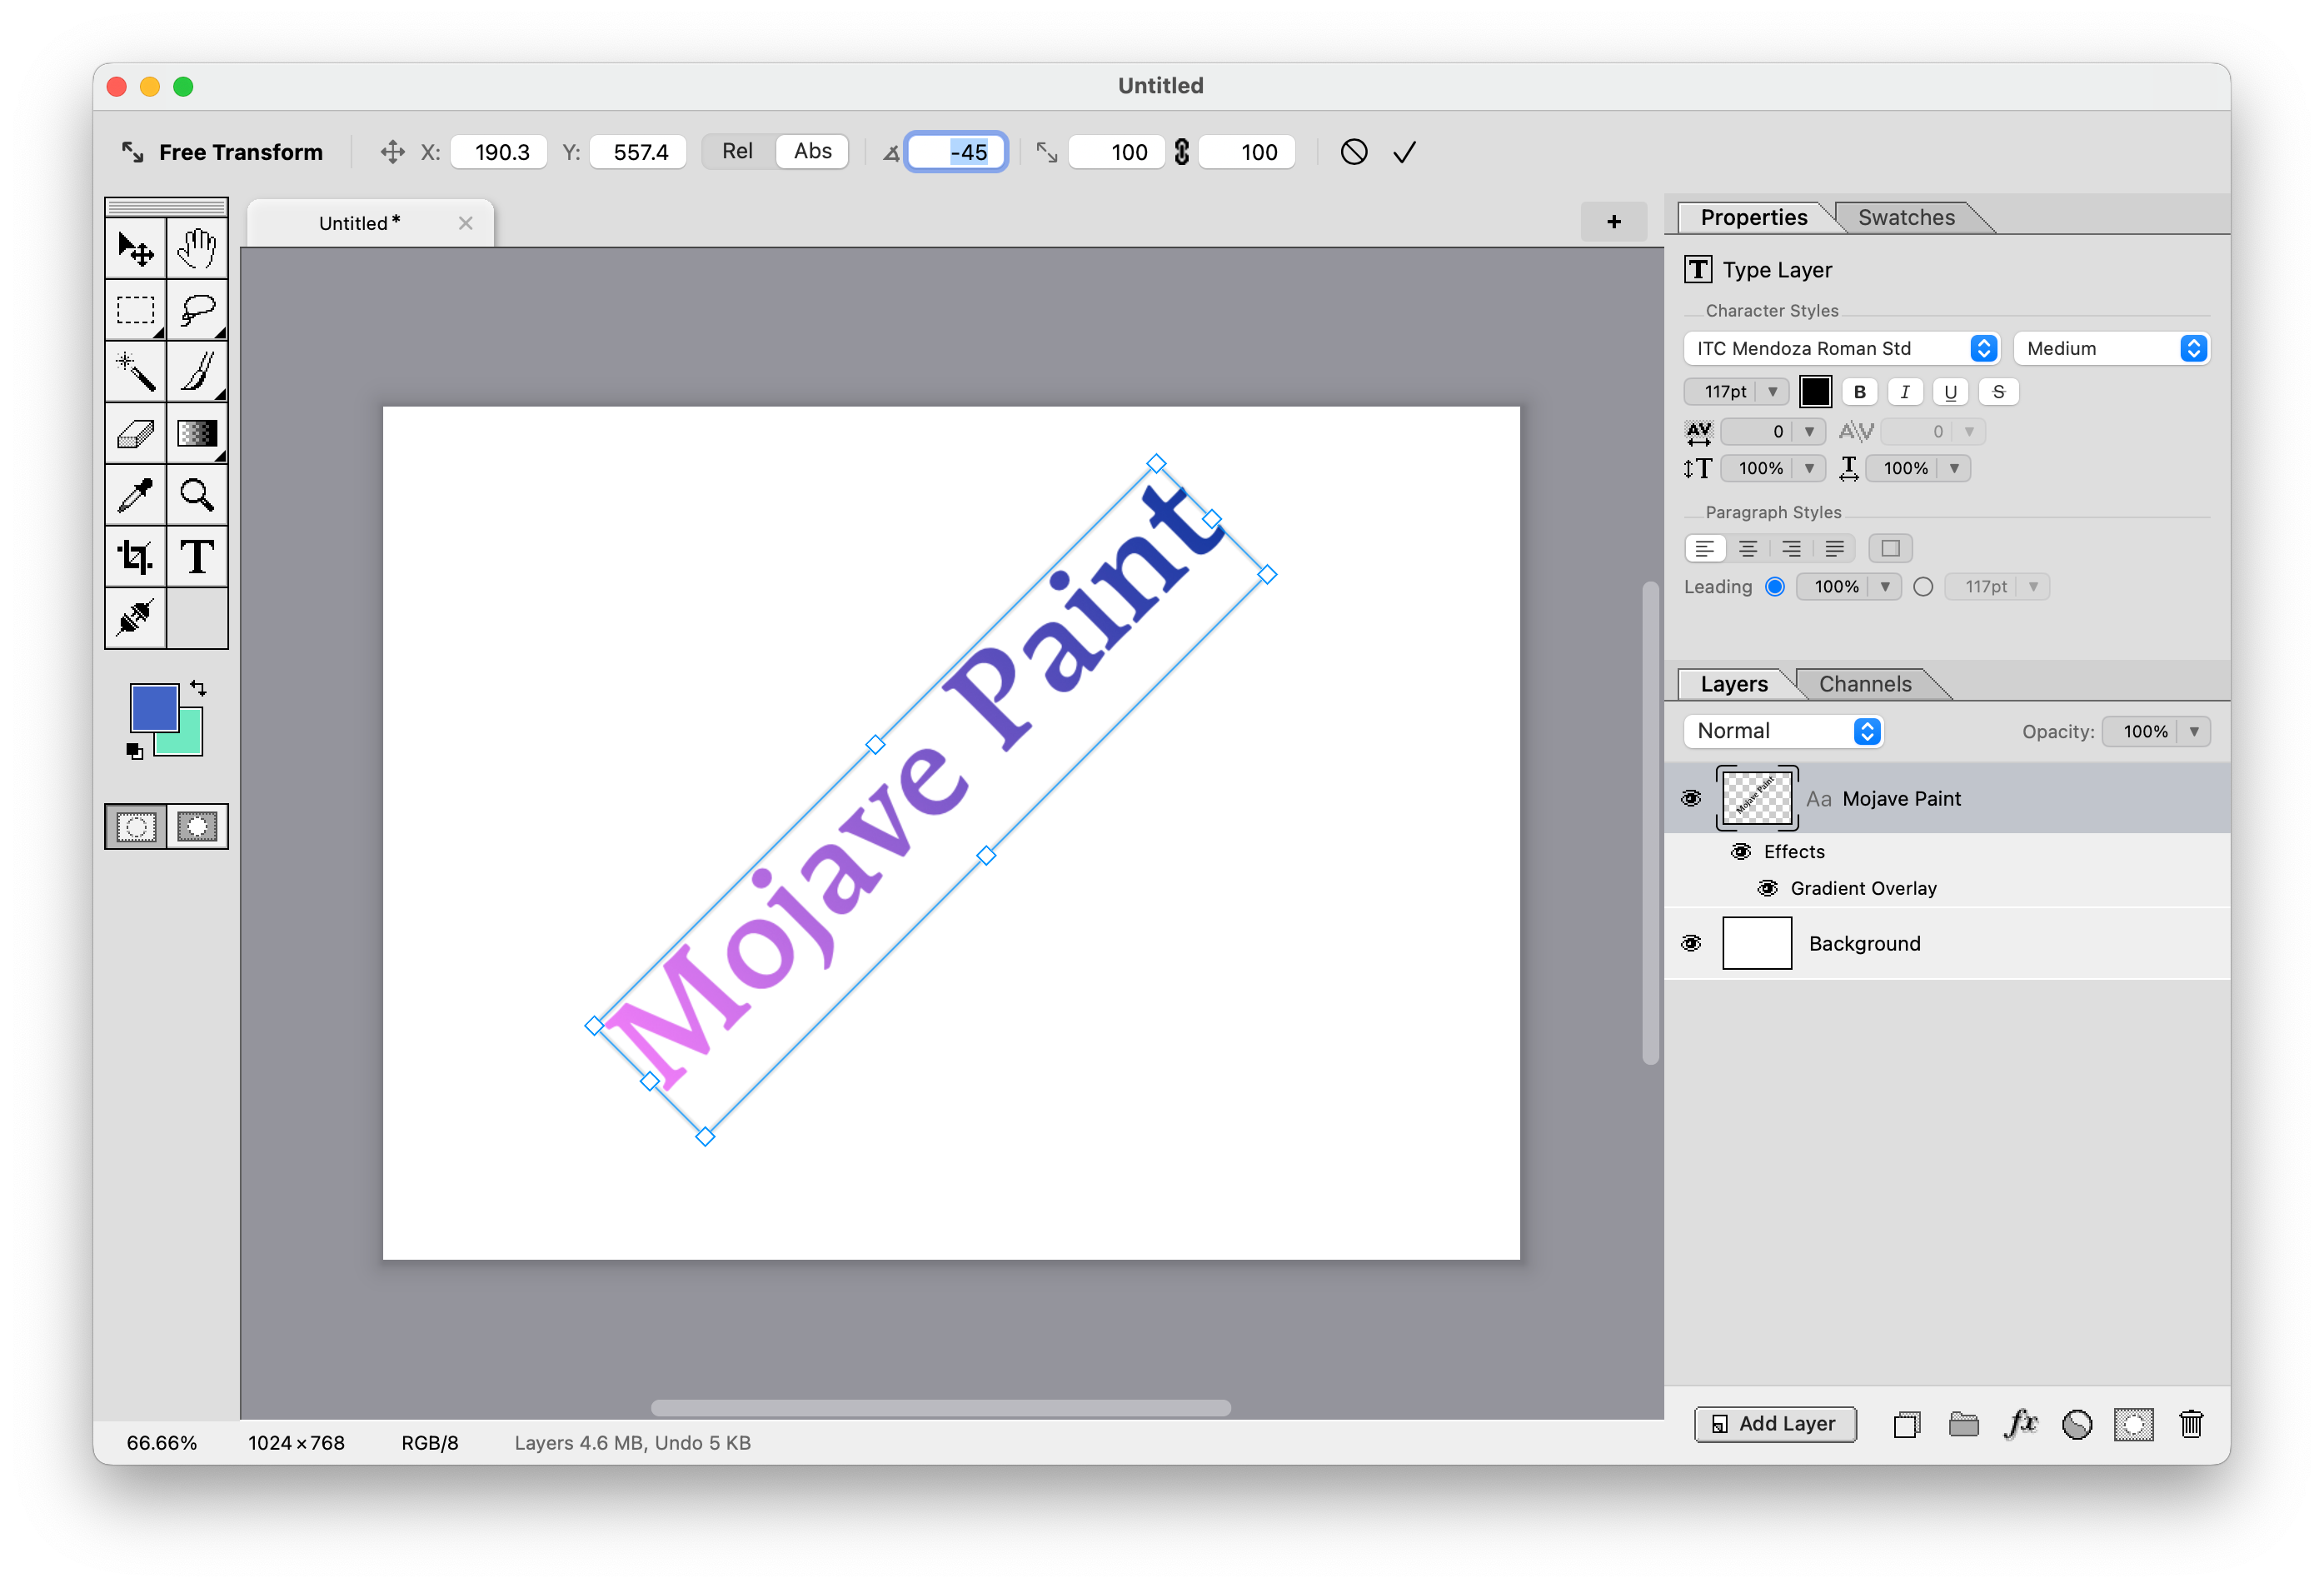
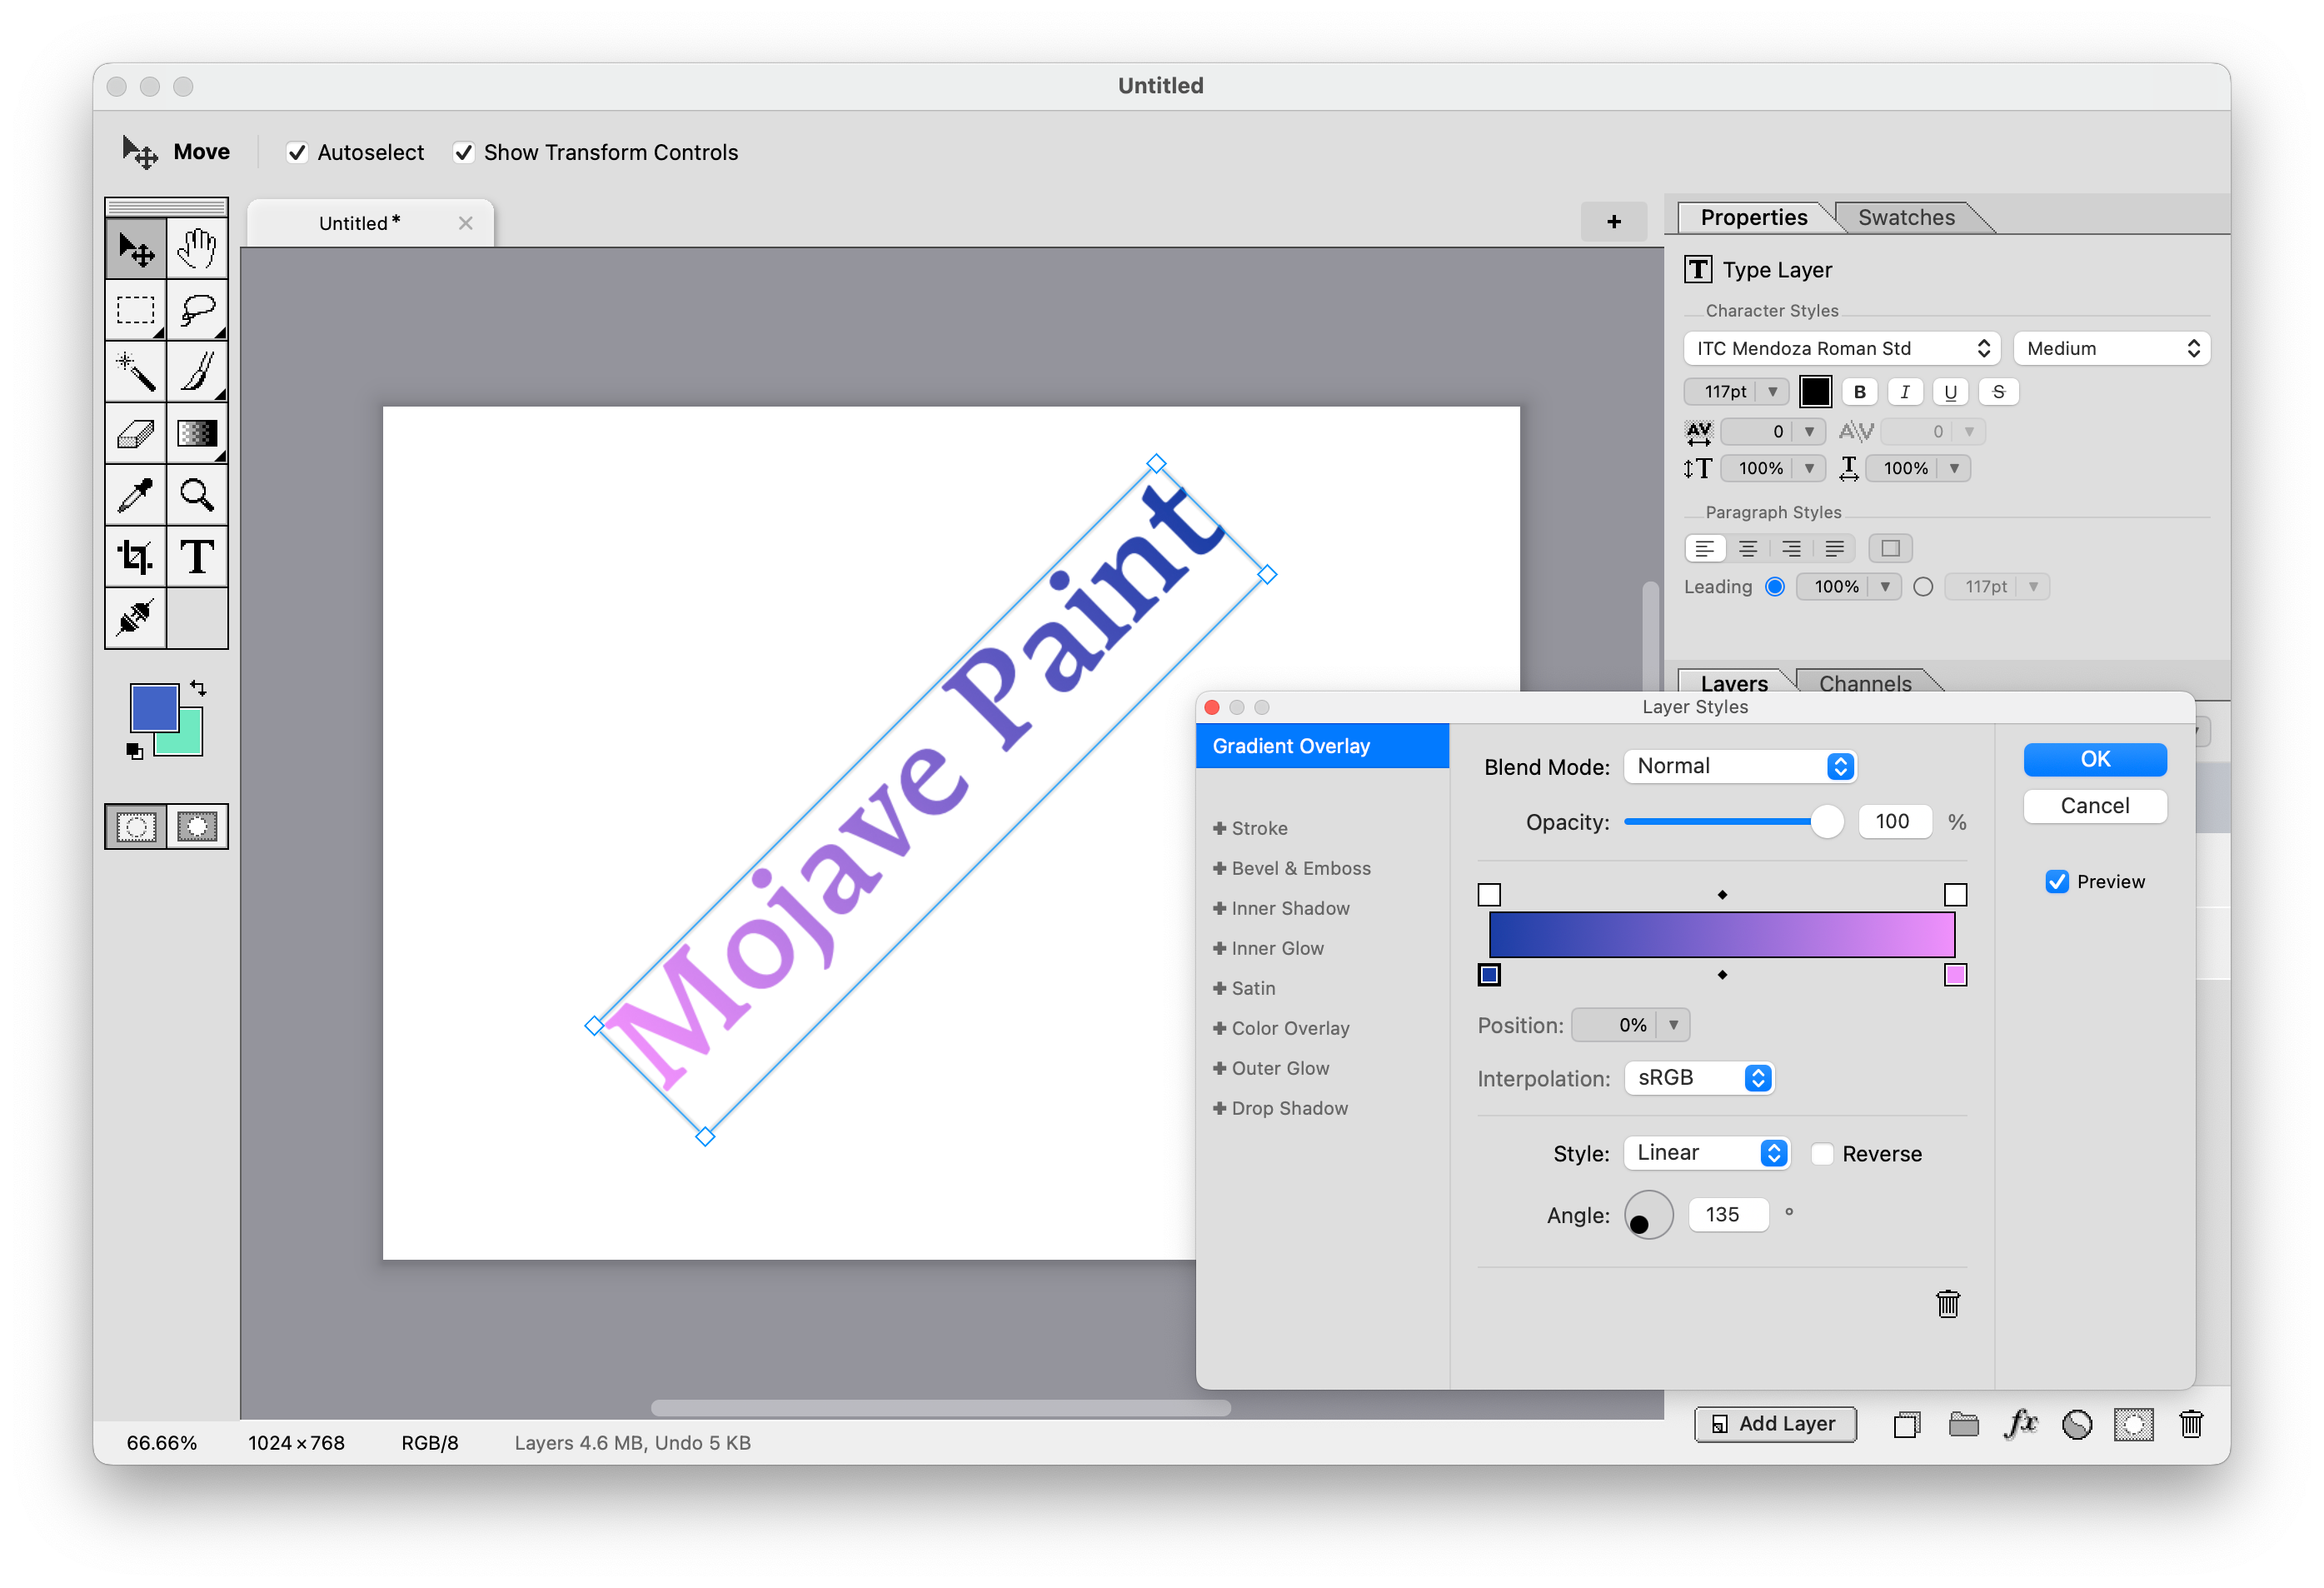
In Photoshop if you rotate a type layer and apply, the bounding box resets to an “axis aligned bounding box” (a squared-up rectangle). This has a number of negative implications:
- It just feels wrong. Type being a vector concept, you’d expect it to maintain an absolute orientation that matches the angle of the baseline, right?1
- You can’t reset the angle in absolute degrees with the free transform tool. Say you rotate an arbitrary amount, then you want to go back and make it 0 degrees plumb and level, there’s no obvious way to do that in Photoshop. In Mojave Paint you just Cmd+T free transform, type 0 in the angle box, and hit Enter.
- The bounding box matters for other reasons, such as the gradient overlay effect. If you rotate a line of type 45 degrees in Mojave Paint and give it a gradient overlay also at 45 degrees, the gradient hugs the type on both ends. In Photoshop the gradient will extend onto the poking-out corners which gives it the wrong range over the actual glyphs.
2. BOLD AND ITALIC BUTTONS
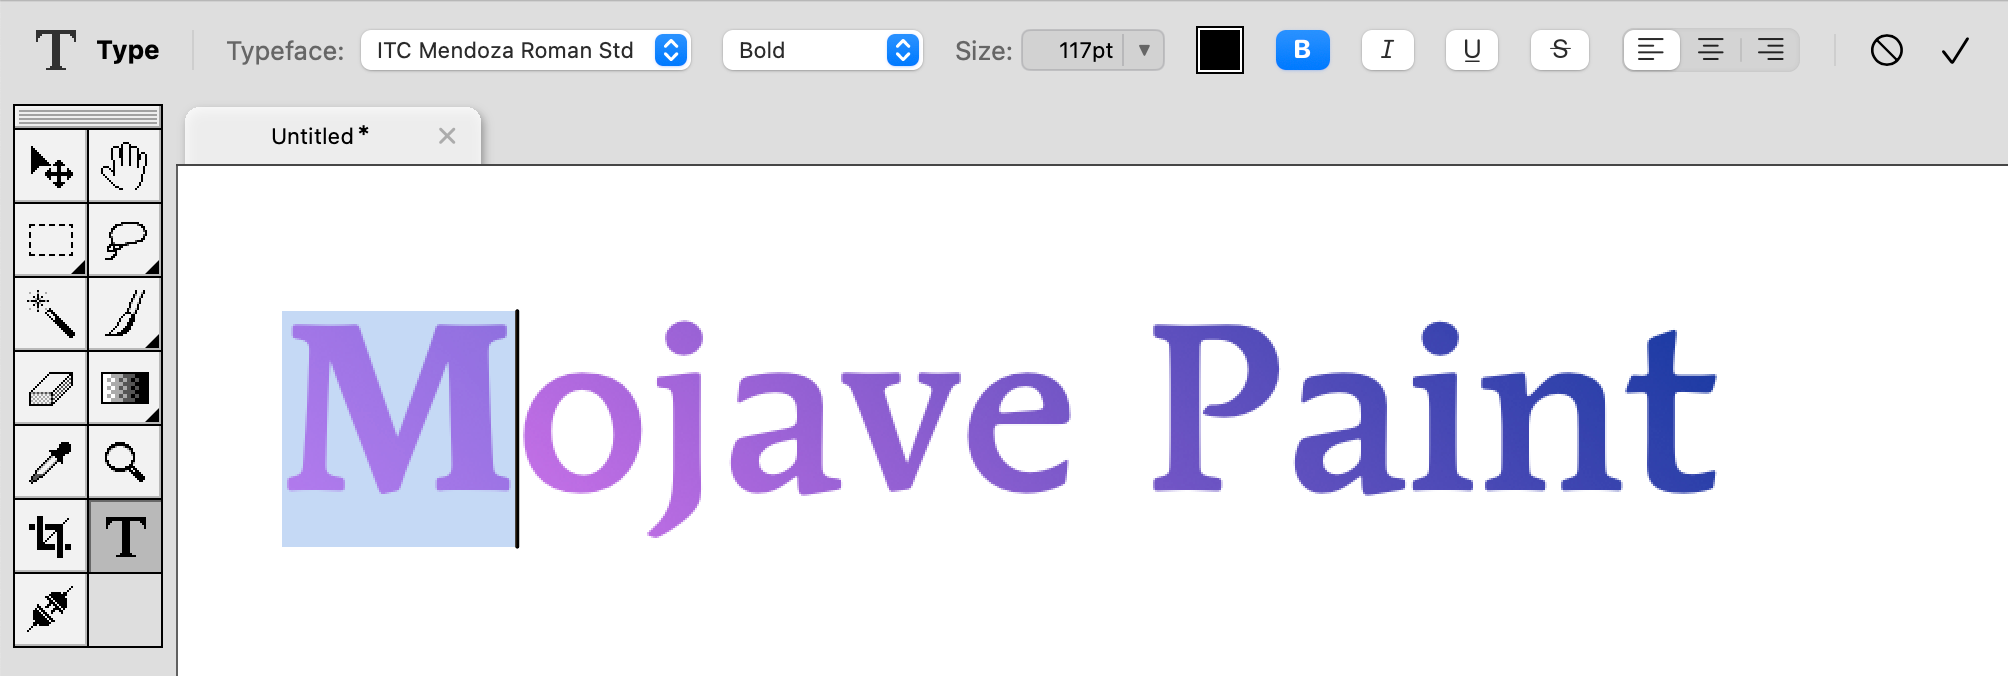
In Mojave Paint, I think of the tool icons as the main characters of the show. They all look very distinctive and all have quite a bit of personality. Some are universal to any type of app, like the magnifying glass for “zoom”, some are universal just to graphics apps, like the eyedropper to mean “sample color.” And some are simply made up.
Over in the type tool, another prominent character in the whole desktop app UX story is the venerable Bold/Italic/Underline trio. This merry band of buttons has been together in pretty much every GUI text editing context since the dawn of personal computers.
But the Bold and Italic ones are sort of redundant, given that you have all the font members listed in the font member picker menu. You might have 20 members to a given font, each with its own weight, obliqueness and expandedness, so what sense does it make to have a Bold and Italic button that selects just one of them for you?
It doesn’t make any sense really, but it feels right. When designing features for Mojave Paint I often weigh three factors against each other, factors I arrange in a triangle in my mind: 1. What’s logical, 2. What feels right and 3. What’s most in line with Photoshop. In this case “feel” won over “logic.”
Did it make the implementation more complex? Absolutely. When you toggle Bold from off to on, it tries to find the best font member by similarity to the existing member, but bold. And bold means “as close as possible to weight 900.” But it’s all worth it to have my familiar text formatting buttons in attendance.
(One little side benefit: Cmd+B and Cmd+I work while editing text, which goes through the same code path as the toggle buttons. These are shortcuts that Photoshop also does not offer.)
3. THE INTERFACE IS NON-MODAL WHEREVER POSSIBLE
In Photoshop almost every accessory window opens “modally” which means you’re blocked from doing anything in the main window. You can’t, for example, open the color picker and keep it open while you’re using the paintbrush to easily change colors. You can’t open an adjustment or filter window and then, while that’s open, drag the selection around on the main canvas.
In Mojave Paint you can do these things and more. You can open a filter or adjustment window and then refine the selection using any of the selection tools, or by opening any of the Select menu dialogs, or even by going into Quickmask.
4. SYSTEM USAGE
Photoshop is one invasive piece of software! The program itself is huge (over 1GB installed), and that’s not counting all the ancillary updater programs and bridge programs and who knows what other Creative Cloud bullshit that runs in the background. Installing Photoshop really means installing the whole Adobe circus and adding Photoshop on top. It’s a genuine resource hog.
And if your disk space is at all tight you’ll see constant “Out of Scratch Disk” messages.
Mojave Paint on the other hand, 10MB installed, no background processes, no network required, and you can uninstall by dragging ~/Applications/Mojave Paint to the trash.2
5. GRAB BAG
And there’s a few more little items, little misses in Photoshop and minor improvements in Mojave Paint, too trivial on their own but together I'd say they add up to another bullet point.
Backtick key with the pencil tool. Photoshop’s Brush tool has “hold backtick for momentary eraser” which is a great feature also in Mojave Paint. But for some reason they don’t have that for the Pencil tool. Mojave Paint does, which is kind of a big deal when you have a 1px pencil and you’re drawing icons, that eraser is really handy.
Magic wand drag. Photoshop seems to be missing the common feature of dragging while using the Magic Wand tool to adjust tolerance and expand or shrink the matched area.
Adjustment layers don't get solid masks. In Photoshop if you have no selection made and you create an adjustment layer, it adds a fully-white layer mask on your behalf. If you watch a few Photoshop tutorials you see people just go back and delete these as they’re nothing but visual noise. In Mojave Paint we don’t create a layer mask unless you have a selection made. Of course you can create a new fully-opaque mask at any time just by hitting the Mask button.
No background layers. One of those things that’s always annoyed me about Photoshop is when you open a new flat file you have to double-click the layer to make it editable. Mojave Paint removes the entire concept of a background layer, saving you a step.
Click through. This is one of those quality of life things that takes one line of code to implement but makes the app feel more polished. If your Mojave Paint window is inactive, you can click or drag the controls in the main window and they work right away. In Photoshop you waste a click just to activate the window, then the second click works.
Hiding the marching ants. Sometimes when you’re previewing adjustments the marching ants get in your way. You can hide them in Photoshop with ctrl-cmd-H, but that has several issues: a) There’s no visual button to click so you have to know the shortcut, b) when they’re hidden there’s no visual indicator that they’re been hidden and c) they hide until the next time the selection gets modified, which is the wrong scope; as a transient state they should hide just until you’ve applied or cancelled your adjustment. Mojave Paint has a much better ant-hiding story which is the “Hide Ants” button present in every adjustment and filter window’s title bar.
So that’s about it. Stay tuned for my “Mojave Paint vs Affinity Photo” article next month!
Footnotes
-
I know why they do it this way – editable type is warpable in Photoshop so there's no longer a clear rectangle or even a clear linear baseline in the general case. But I'd say do the right thing for the common case of affine-only transformation. ↩
-
To really uninstall fully, you'd also want to delete
~/Library/Containers/com.skullrocksoftware.mojavepaintand delete any user preferences by doingdefaults delete com.skullrocksoftware.mojavepaint. ↩